From Local to Live: Deploying a TYPO3 Project on Debian


When I decided to deploy my TYPO3 project, I already had some experience navigating their documentation—arguably the steepest learning curve I have encountered thus far. This isn't solely due to the complexity of the system itself, but rather the need for a complete overhaul of their documentation.
After going through their documentation to collect all the requirements and a lot of trial and error, I was able to create a series of logical steps. All of this was done within a Debian Trixie virtual environment, and when I was ready, I deployed the project to a server running Debian Bookworm (versions 13 and 12, respectively). You will need administrator rights to follow along and be comfortable on the command line.
Additionally, the choices I made were personal. For instance, I decided to use rsync over git for the simple reason that I had never used rsync before. Also, this setup is intended for a demo website on a server and not a production server. There are many security recommendations that I chose to skip because my threat level is low. I installed the demo project on a VPS that has nothing else on it; if it gets compromised, it doesn't matter.
I also know what I'm doing—to a certain degree. I ran many commands with sudo. In fact, I did it as the root user. The point is, you don't want to be doing either one of those unless you know what is being affected in your system. As far as I’m concerned, never run sudo on any external scripts.
First, we will add a file and change a few lines of code to handle environment variables. Then we will prepare the server and configure Nginx. Finally, we will create a database and sync our project to our server.
Since all new local projects are installed using ddev, which does a good job of configuring our local environment, we'll create a .env file and modify the settings.php file in our config folder to manage our environment variables, along with a plugin that accesses those variables.
The dotenv file we are creating will hold the information necessary to access the database on the server. It might make more sense to do this later, but we are going to configure settings.php to work with both your local and production environments.
# Database Configuration
DATABASE_HOST="localhost"
DATABASE_PORT=3306
DATABASE_NAME="production_database"
DATABASE_USER="alexander"
DATABASE_PASSWORD='!@RiFmTmp_B0di'

# Typo3 Environment
TYPO3_CONTEXT="Production"

# I hope it goes without saying to change the values for NAME, USER and PASSWORD.
If you don't have openssl installed on your machine to generate a secure password, use the second option.
openssl rand -base64 14 | cut -c1-14

< /dev/urandom tr -dc 'A-Za-z0-9_!@#$%^&*()' | head -c 14 ; echo
Next, find the configuration in config/system/settings.php
    'DB' => [
        'Connections' => [
            'Default' => [
                'charset' => 'utf8mb4',
                'dbname' => 'db',
                'defaultTableOptions' => [
                    'charset' => 'utf8mb4',
                    'collation' => 'utf8mb4_unicode_ci',
                ],
                'driver' => 'mysqli',
                'host' => 'db',
                'password' => 'db',
                'port' => 3306,
                'user' => 'db',
            ],
        ],
    ],
It will be updated to:
    'DB' => [
        'Connections' => [
            'Default' => [
                'charset' => 'utf8mb4',
                'dbname' => getenv('DATABASE_NAME') ?: 'db',
                'defaultTableOptions' => [
                    'charset' => 'utf8mb4',
                    'collation' => 'utf8mb4_unicode_ci',
                ],
                'driver' => 'mysqli',
                'host' => getenv('DATABASE_HOST') ?: 'localhost',
                'password' => getenv('DATABASE_PASSWORD') ?: 'db',
                'port' => getenv('DATABASE_PORT') ?: 3306,
                'user' => getenv('DATABASE_USER') ?: 'db',
            ],
        ],
    ],
The line getenv('DATABASE_NAME') ?: 'db', is a shorthand conditional expression that checks which side is true.
Now we can move on to our server. Start by updating, upgrading and installing packages.
There are a couple of caveats with the following commands. When you install PHP, it installs Apache2 automatically, which will conflict with our Nginx server. You could optionally tell your package manager not to install the recommended packages, but I did not look too deeply into what other packages, if any, would not be installed and if they were needed. So I opted to just uninstall it after it gets installed.
The version for php-fpm changes between Debian versions. Debian Bookworm uses version 8.2 while Debian Trixie uses 8.4.
# Update system
sudo apt update && sudo apt upgrade -y

# Install required packages
sudo apt update
sudo apt install -y nginx mariadb-{server,client} php && sudo apt remove --purge apache2 && sudo apt autoremove
sudo apt install php-{fpm,mysql,xml,mbstring,curl,intl,zip,gd,common} composer
Typo3 requires some configuration changes.
Edit /etc/php/8.2/fpm/php.ini (Remember that the version number can be different.)
memory_limit = 256M
max_execution_time = 240
max_input_vars = 1500
pcre.jit = 1
upload_max_filesize = 10M
post_max_size = 10M
Modify PHP-FPM Pool Configuration
Make sure these match in /etc/php/8.2/fpm/pool.d/www.conf (once again, remember that the version number can change).
listen.owner = www-data
listen.group = www-data
listen.mode = 0660

; Ensure these match
user = www-data
group = www-data
Next, we will create an Nginx configuration file. Before doing that, check the default configuration file at /etc/nginx/nginx.conf to ensure it includes the line include /etc/nginx/sites-enabled/*; within the http { } block. This line will allow Nginx to include all the files we want to enable.
Create /etc/nginx/sites-available/typo3.conf
server {
    listen 80;  # Listen on port 80 for HTTP
    server_name localhost;  # Replace with your domain

    root /var/www/typo3/folder-name/public;  # Document root
    index index.php index.html;

    # TYPO3 - GZIP support for versioned .js and .css files
    location ~ \.js\.gzip$ {
        add_header Content-Encoding gzip;
        gzip off;
        types { text/javascript gzip; }
    }

    location ~ \.css\.gzip$ {
        add_header Content-Encoding gzip;
        gzip off;
        types { text/css gzip; }
    }

    # TYPO3 - Rewrite versioned static resources
    if (!-e $request_filename) {
        rewrite ^/(.+)\.(\d+)\.(php|js|css|png|jpg|gif|gzip)$ /$1.$3 last;
    }

    # TYPO3 - Deny access to sensitive files and directories
    location ~* composer\.(?:json|lock)$       { deny all; }
    location ~* flexform[^.]*\.xml$            { deny all; }
    location ~* locallang[^.]*\.(?:xml|xlf)$   { deny all; }
    location ~* ext_conf_template\.txt$        { deny all; }
    location ~* ext_typoscript_.*\.txt$        { deny all; }
    location ~* \.(?:bak|co?nf|cfg|ya?ml|ts|typoscript|tsconfig|dist|fla|in[ci]|log|sh|sql|sqlite)$ {
        deny all;
    }
    location ~ _(?:recycler|temp)_/            { deny all; }
    location ~ fileadmin/(?:templates)/.*\.(?:txt|ts|typoscript)$ { deny all; }
    location ~ ^(?:vendor|typo3_src|typo3temp/var) { deny all; }
    location ~ (?:typo3conf/ext|typo3/sysext|typo3/ext)/[^/]+/(?:Configuration|Resources/Private|Tests?|docs?)/ {
        deny all;
    }

    # TYPO3 - Frontend entry point
    location / {
        try_files $uri $uri/ /index.php$is_args$args;
    }

    # TYPO3 - Backend entry point
    location = /typo3 {
        rewrite ^ /typo3/;
    }
    location /typo3/ {
        absolute_redirect off;
        try_files $uri /index.php$is_args$args;
    }

    # TYPO3 - PHP handler via PHP-FPM
    location ~ [^/]\.php(/|$) {
        fastcgi_split_path_info ^(.+?\.php)(/.*)$;
        if (!-f $document_root$fastcgi_script_name) {
            return 404;
        }
        fastcgi_buffer_size 32k;
        fastcgi_buffers 8 16k;
        fastcgi_connect_timeout 240s;
        fastcgi_read_timeout 240s;
        fastcgi_send_timeout 240s;

        fastcgi_pass unix:/run/php/php8.4-fpm.sock;  # Adjust if your PHP-FPM is configured differently
        fastcgi_index index.php;
        include fastcgi.conf;  # Include the default FastCGI parameters
    }

    error_log /var/log/nginx/typo3-error.log;  # Custom error log
    access_log /var/log/nginx/typo3-access.log;  # Custom access log
}
Make sure to pay attention to the first three lines of the configuration file:
server_name localhost;  # Replace with your domain
root /var/www/typo3/folder-name/public;  # Document root
If you have a domain name that points to your server, replace localhost with your actual domain name. The root directive should match the directory where you place the TYPO3 project.
Configuration Management
The convention with nginx is to create the file in /sites-available/ and then create a symbolic link into /sites-available/. This allows for easier management of your configuration files:
sudo ln -s /etc/nginx/sites-available/typo3.conf /etc/nginx/sites-enabled/
Make sure the checks pass with your nginx configuration files. If you encounter any errors try to resolve them before moving on.
sudo nginx -t
sudo systemctl restart nginx
sudo systemctl restart php8.4-fpm
Create TYPO3 Database
Remember when I mentioned there were security implications I skipped over? Here's one example.
sudo mysql -e "CREATE DATABASE typo3_db CHARACTER SET utf8mb4 COLLATE utf8mb4_unicode_ci;"
sudo mysql -e "CREATE USER 'typo3_user'@'localhost' IDENTIFIED BY 'strong_password';"
sudo mysql -e "GRANT ALL PRIVILEGES ON typo3_db.* TO 'typo3_user'@'localhost';"
sudo mysql -e "FLUSH PRIVILEGES;"
Instead of Granting all privileges, here you would want pick the ones the database user needs to perform its tasks. However, it's fine for our purposes here.
Remember which is the document root you used in your typo3 nginx configuration.
/etc/nginx/sites-available/typo3.conf
root /var/www/typo3/folder-name/public; # Document root
Create the directory where yout project will live. This is the directory that nginx will search for to serve the files.
mkdir -p /var/www/typo3/project
Rename project to match what you have in your nginx configuration file. Where it says project.
Now, go back to your project on your local machine.
We will export the database and transfer it, along with the project to the server.
ddev export-db --gzip --file=typo3_migration.sql
Note that ddev compresses the database under the hood. If you try to import it with the default instructions from the typo3 documentation, it will fail.
Another caveat is where we will transfer the files. Ideally, we would transfer them directly to /var/www/typo3, but that location is owned by the user www-data, which has a host of conventions and security restrictions in place. Instead of altering what www-data is allowed to do on the server, we'll change the ownership of the files back to www-data after the transfer.
The syntax for transfer files is:
scp /path/to/file user@production_server:/var/www/typo3/project/
/path/to/file is the file we are interested in transfering over to the server.
/var/www/typo3/project/ change this to a location your user is allowed to write to. A good option would be your home directory /home/your-user/.
scp typo3_migration.sql user@production_server:/home/your-user/
Now we will transfer the typo3 project over using rsync. If you're rejected from transfering to /var/www/typo3, I'll leave this as a task for you to figure out.
# rsync -avzn
# the option n is for dry run
# if you want to see what happens without actually running the operation
# add it to the command
rsync -avz \
    --exclude='.ddev' \
    --exclude='.git' \
    --exclude='var' \
    --exclude='vendor' \
    --exclude='public/_assets' \
    --exclude='public/fileadmin/_processed_' \
    --exclude='public/fileadmin/_temp_' \
    --exclude='public/fileadmin/form_definitions' \
    --exclude='public/fileadmin/.htaccess' \
    --exclude='public/typo3temp' \
    --exclude='public/typo3/' \
    --exclude='packages/.gitkeep' \
    project-location/ debian:/var/www/typo3/folder-name
Now that we have transferred all the necessary files, let’s move back to our server and navigate to the directory of the TYPO3 project. Run the following commands to get everything set up. First, try running the commands without elevated privileges. If you encounter issues, use sudo to execute them. But, as I mentioned earlier, you rarely ever want to use sudo to gain permission to execute commands. If you are on a production server, even on your local machine, find another way to get the job done.
# Install Composer dependencies
composer req helhum/dotenv-connector
composer install --no-dev --optimize-autoloader

# Clear TYPO3 cache
./vendor/bin/typo3 cache:flush
./vendor/bin/typo3 cache:warmup

# Set permissions
sudo chown -R www-data:www-data /var/www/typo3/
sudo chmod -R 755 /var/www/typo3/
At this point, you should be able to access your website.
SSL Configuration
I skipped explaining how to add SSL to your site because it is pretty straightforward. Follow the instructions provided by Let's Encrypt using certbot. https://certbot.eff.org/
Troubleshooting
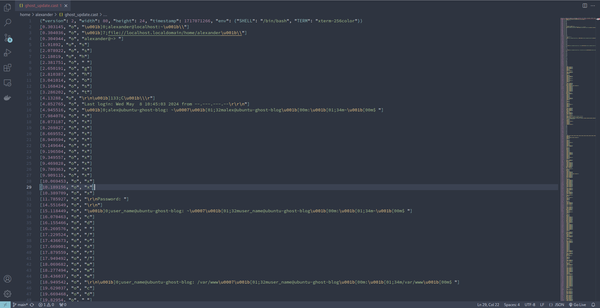
If everything isn't working as expected, reviewing the error messages will guide you to where the issue lies. A good first step is to restart Nginx a couple of times to see if that resolves the problem.
sudo systemctl restart nginx
If you run into issues, check which point triggers the error. If everything seems fine but the browser is showing an error, it will generally indicate where to look—whether it's an Nginx issue or a TYPO3 problem.
To check the error logs on Nginx, use the following commands:
# For the default log location
sudo tail -f /var/log/nginx/error.log

# For your custom TYPO3 error log
sudo tail -f /var/log/nginx/typo3-error.log
This will show you the most recent error messages in real-time, helping you identify what might be going wrong.
Sources:
- https://docs.typo3.org/permalink/t3coreapi:manual-deployment-initial
- https://nginx.org/en/docs/beginners_guide.html
- https://www.gnu.org/software/tar/manual/
P.S. Before using rsync, I originally tried the tar command. Its manual serves as a great example of what comprehensive technical documentation should look like, much like the Nginx documentation.